Windows agent installation and deployment
Overview
This guide provides comprehensive instructions for installing and uninstalling the Redtrust agent in Windows environments. It includes steps for standard installations, silent installations (automated setups with no user interaction), and server mode installations (for unattended environments). This guide is intended for system administrators or anyone responsible for deploying and configuring Redtrust.
By the end of this guide, you will have installed the Redtrust agent and be able to set up the platform.
Background
These are the details of the three types of installation:
- Standard installation: Installs the agent with a guided setup wizard.
- Server mode installation: Designed for unattended environments where Windows server-based applications need centralized certificates without user interaction. Certificates are loaded into the machine certificate store, not the user store.
- Silent installation: Runs the installation in the background without showing the wizard or requiring user input.
Before you start
If you install Redtrust on Windows, ensure you have the installation package, including an installer (MSI) file and a batch file (bat).
Redtrust is only compatible with AutoFirma 1.8.4 or higher.
The right installation type depends on your environment. Use standard installation if the agent is being installed on an end-user machine with an active user session, or silent installation for mass deployment via GPO, SCCM, or similar systems. If Windows server applications need to access certificates without a logged-in user, use server mode installation: the agent runs no processes in user space and certificates are loaded into the machine certificate store, not the user store.
System requirements
- Microsoft Windows 10 or 11 (64-bit or ARM64), or Windows Server 2022, 2019, or 2016.
- .NET Framework 4.8.
- Microsoft .NET Runtime 8.0.0 (x64). From Redtrust 4.42.2, the agent requires .NET Runtime 10.
- Visual C++ Redistributable for Visual Studio 2015-2022 x64 (or ARM64 on ARM64 platforms).
- Visual C++ Redistributable for Visual Studio 2015-2022 x86.
- Administrator privileges (required only during installation).
Step 1: Install the agent
- Standard installation
- Silent installation
- Server mode installation
The Redtrust agent is provided as an MSI package, accepting multiple parameters listed in the parameters page. Two versions are available: one for 64-bit systems and a native ARM64 build.
The MSI filename includes the architecture: rt-agent-x64-VERSION-SUFFIX.msi for 64-bit and rt-agent-ARM64-VERSION-SUFFIX.msi for ARM64.
An example of agent installation can be the following:
msiexec /i rt-agent-x64-VERSION-SUFFIX.msi RTPRIMARY="PRIMARY_SERVER" RTSECONDARY="SECONDARY_SERVER" CLIENTID="YOUR_CLIENT_ID" LANGUAGE="en-US" AuthMode=ActiveDirectory
Where:
PRIMARY_SERVERandSECONDARY_SERVERare the addresses of the primary and secondary Redtrust servers.YOUR_CLIENT_IDis the client identifier for your Redtrust installation.
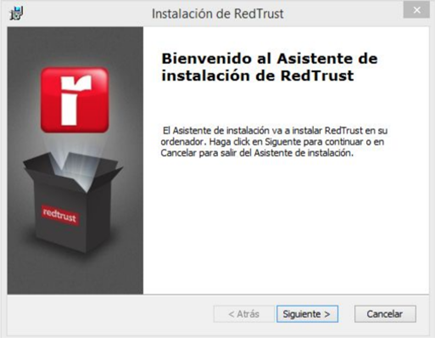
The installation process is guided through a wizard where you can specify the directory where the product will be stored. The process will take only a few seconds.
Use the msiexec command for silent installation. For a completely silent setup, run:
msiexec /i rt-agent-x64-VERSION-SUFFIX.msi RTPRIMARY="PRIMARY_SERVER" RTSECONDARY="SECONDARY_SERVER" CLIENTID="YOUR_CLIENT_ID" LANGUAGE="en-US" AuthMode=ActiveDirectory /qn
Where:
PRIMARY_SERVERandSECONDARY_SERVERare the addresses of the primary and secondary Redtrust servers.YOUR_CLIENT_IDis the client identifier for your Redtrust installation.
If silent installation fails due to prerequisites, install vc_redist separately, then rerun the installer with the NO_REDIST option.
To diagnose silent installation failures, append /l*v log_verbose.txt to the msiexec command. This generates a verbose log that helps identify the cause of the problem.
For unattended environments, set the AGENTMODE parameter to SERVER to install the agent in server mode. In this mode, certificates are loaded into the machine certificate store, not the user store.
msiexec /i rt-agent-x64-VERSION-SUFFIX.msi RTPRIMARY="PRIMARY_SERVER" RTSECONDARY="SECONDARY_SERVER" CLIENTID="YOUR_CLIENT_ID" AuthMode=LocalUsers AGENTMODE="SERVER" LANGUAGE="es-ES"
Where:
PRIMARY_SERVERis the address of the primary Redtrust server.SECONDARY_SERVERis the address of the secondary Redtrust server.YOUR_CLIENT_IDis the client identifier for your Redtrust installation.
Once installed in the Redtrust installation folder (by default c:\Program Files\Redtrust) use the rtsetup.exe tool to configure Redtrust.
> rtsetup
This command returns:
  Tool to configure the Redtrust Server Agent.
  Usage:
    rtsetup.exe -authMode=[LocalUsers|Ldap] -username=[username] -password=[password]
    or
    rtsetup.exe -authMode=ActivationCode -code=[activation code]

  Optional parameters:
    -primaryServer=[IP or hostname]
    -secondaryServer=[IP or hostname]
    -servicePort=[Port] (default value: 443)

  Note: Both need to be set at once. Port is only updated when servers are set.

  Use this tool in order to:
    Set RedTrust credentials for agent (local users or activation code).
    Set Redtrust server addresses.

  After tool execution, service RTService needs to be restarted in order to refresh configuration.
For example, to authenticate with a local user:
rtsetup.exe -authMode=LocalUsers -username=YOUR_USERNAME -password=YOUR_PASSWORD
Where:
YOUR_USERNAMEis your Redtrust username (inname@domainformat).YOUR_PASSWORDis your Redtrust password.
Automate the complete deployment
For environments where multiple servers are deployed via GPO, SCCM, or similar systems, chain the previous steps in a single .bat file:
msiexec /i rt-agent-x64-VERSION-SUFFIX.msi RTPRIMARY="PRIMARY_SERVER" RTSECONDARY="SECONDARY_SERVER" CLIENTID="YOUR_CLIENT_ID" AuthMode=LocalUsers AGENTMODE="SERVER" /l*v log_verbose.txt /qn
echo Exit Code is %errorlevel%
timeout 120
"C:\Program Files\Redtrust\rtsetup.exe" -authMode=LocalUsers -username=YOUR_USERNAME -password=YOUR_PASSWORD
net stop RTService && net start RTService
Where:
PRIMARY_SERVERandSECONDARY_SERVERare the addresses of the primary and secondary Redtrust servers.YOUR_CLIENT_IDis the client identifier for your Redtrust installation.YOUR_USERNAMEandYOUR_PASSWORDare the credentials of the local user with access to the certificate.
The timeout 120 command gives the installation time to finish before rtsetup runs. Adjust the value based on your environment. Finally, net stop/net start restarts the RTService service to apply the new configuration.
If the agent fails to connect, see the server mode agent events reference to identify the issue in the Windows event log.
The LANGUAGE and AuthMode values shown in the commands are examples; see the installation parameters page for valid values and other supported parameters. Running the installer without parameters installs the agent with default configurations.
Step 2: Configure the browser
After installing the agent, configure browsers to enable Redtrust certificate management. Follow the steps defined in How to configure your browser.
Step 3: Verify the installation
Test the installation by uploading and using a certificate, as explained in the initial configuration tutorial.
Uninstallation
You can unistall Redtrust in two ways:
Interactive uninstallation
Use the standard Windows Programs and Features interface to remove Redtrust.
Unattended uninstallation
For unassisted uninstallation, use the msiexec command:
msiexec /x {5F567E45-9801-4122-9213-1731DBC44E11} /q
To retrieve the installed agent's Globally Unique Identifier (GUID), query the Windows registry with the following PowerShell command:
Get-ItemProperty HKLM:\SOFTWARE\Microsoft\Windows\CurrentVersion\Uninstall\* |
    Where-Object { $_.DisplayName -like "*Redtrust*" } |
    Select-Object DisplayName, DisplayVersion, PSChildName
This command outputs details such as:
DisplayName    : RedTrust
DisplayVersion : 4.10.5
PSChildName    : {5F567E45-9801-4122-9213-1731DBC44E11}
The PSChildName value is the GUID that you pass to msiexec.
Next steps
Now that you've verified the installation, you can:
Was this page helpful?