Tutorial: Initial Redtrust configuration
Overview
In this tutorial, you'll learn the first steps for using a certificate with Redtrust. It assumes you have basic understanding of digital certificates and want to familiarize yourself with Redtrust.
By the end of this tutorial, you will be able to use Redtrust to access the Sede Digital de la Dirección General de Tráfico (DGT) with your certificate. In other words, you'll learn how to put a certificate to use. If you just installed Redtrust, this tutorial will help you verify that Redtrust was set up correctly.
Background
As described in the Introduction, administrators can manage and configure Redtrust remotely via the admin console. A key feature of the admin console is the ability to define policies, sets of rules that define how certificates are used. Defining policies ensures the secure and appropriate use of certificates within an organization. To create a policy, administrators have to upload a certificate and define the following:
- Which users can use it.
- Where it can be used (specific applications and sites).
- When it can be used (specific times).
In this tutorial, you'll create a policy that allows unrestricted use of a certificate in any application or site. For simplicity, the user in this guide is a local one. For other authentication methods, refer to the Domains documentation.
Before you start
Before starting, ensure the following:
- Redtrust agent is installed on your system.
- You have access to:
- A digital certificate in P12 or PFX format.
- A Redtrust IP address and credentials.
- A domain for local users
- A certificate group.
Step 1: Add a local user
After deploying Redtrust, add the users who you want to access to the certificates. One way to do that, is manually adding them as local users. To add a local user:
-
Access the admin console at
https://YOUR_REDTRUST_IP/using your credentials. -
Go to Access in the navigation menu and click the local users domain row.

If you don't have a local users domain:
-
Click on New.
-
Add an alias or name for the domain (
company.localin the example) and select Local users from the menu.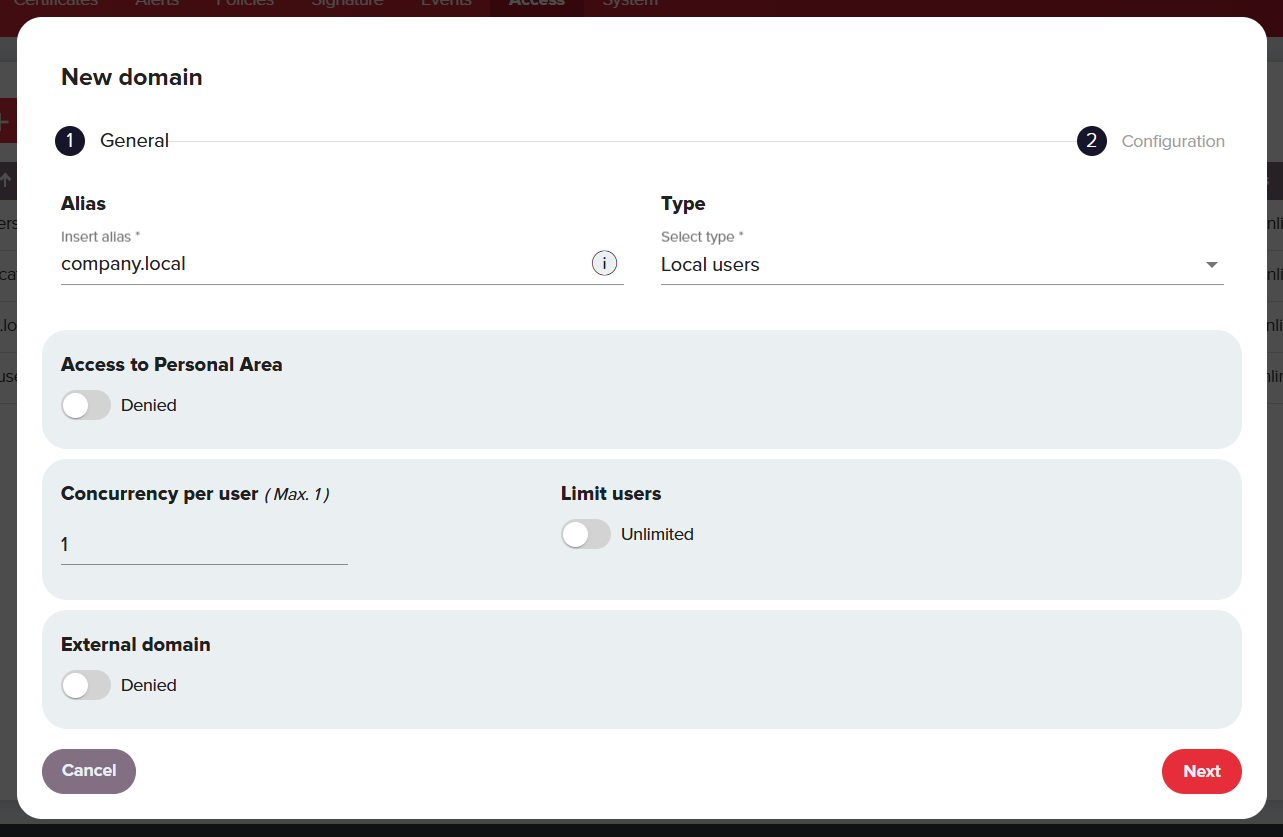
-
Click Next and Apply. Now that you have a domain, click on its row.
-
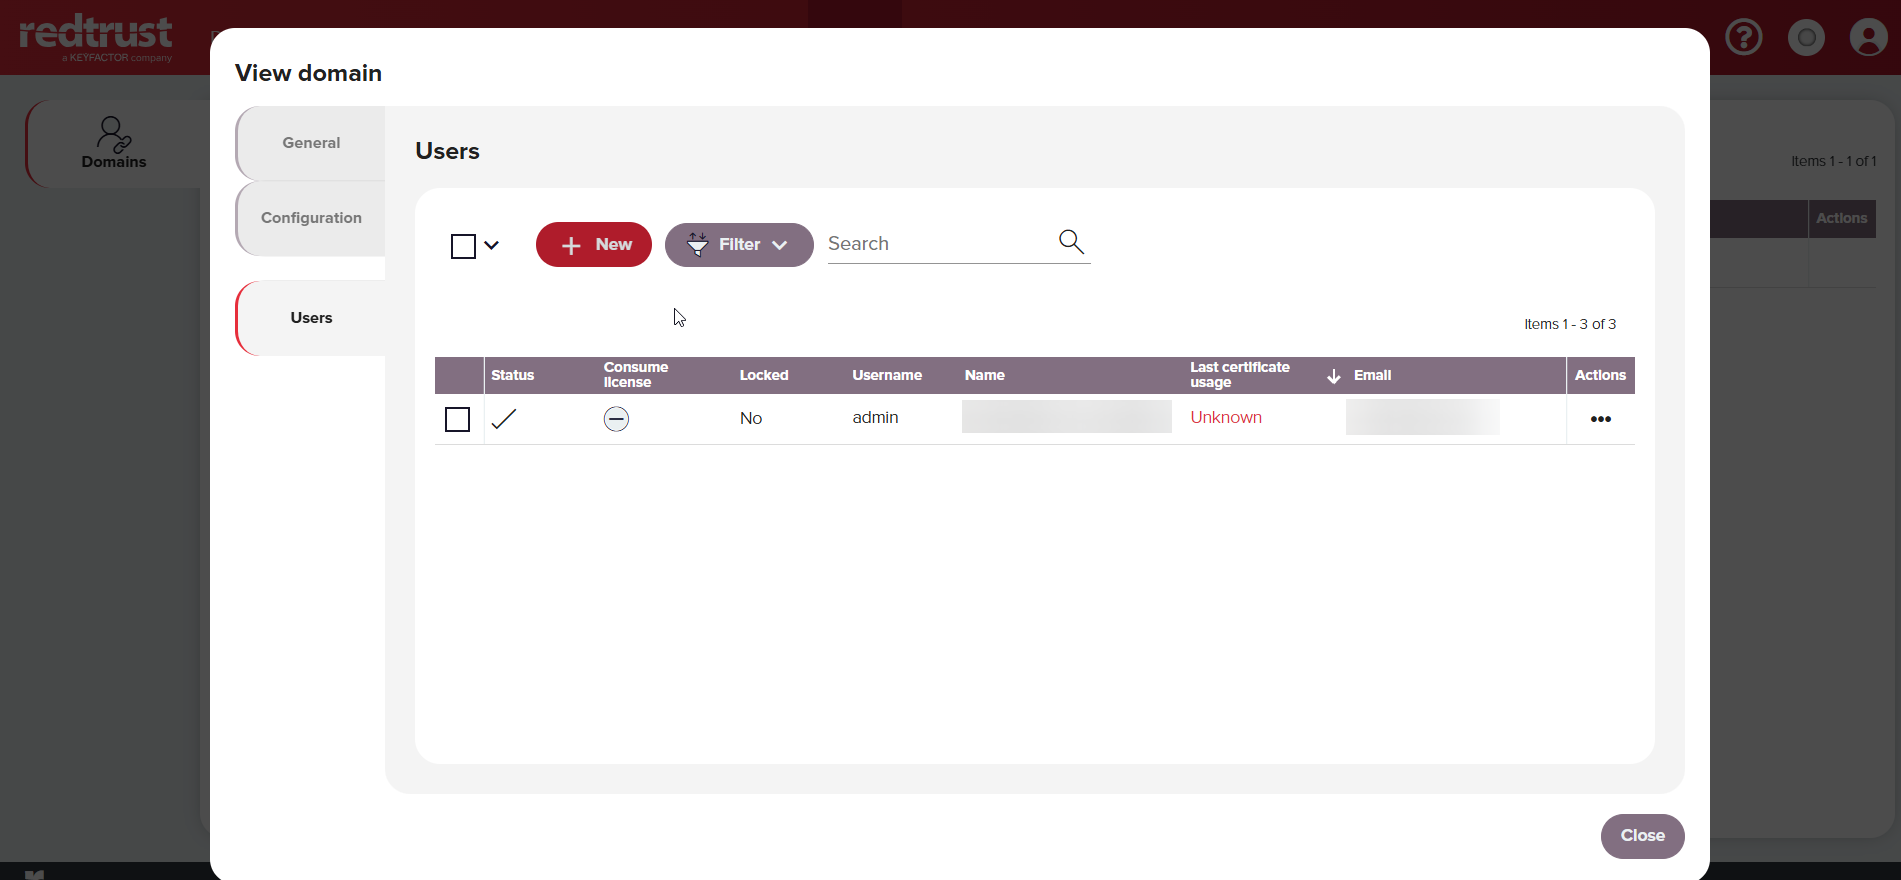
-
In domain configuration dialog box, go to the Users tab and click New.
-
Fill in the fields:
- Username: Use the part of the email address before the "@" symbol (in the example,
jane.doe). - Name: Enter the user's full name (in the example
Jane Doe). - Email and Password.
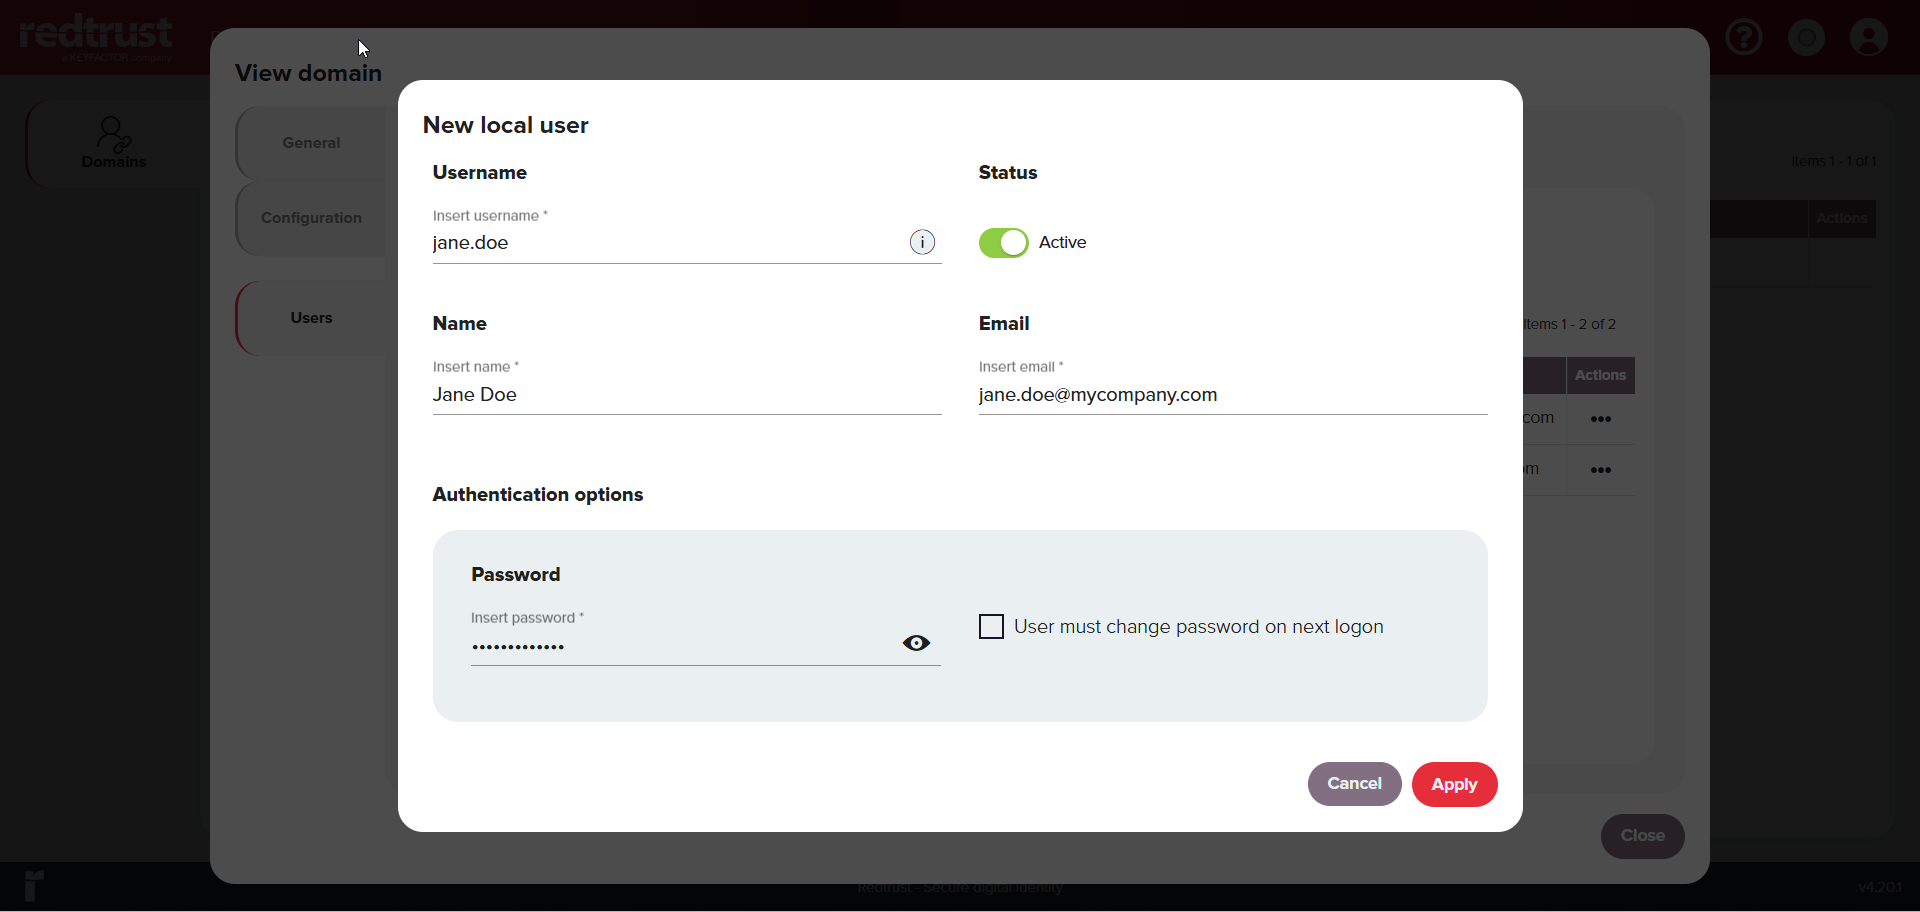
- Username: Use the part of the email address before the "@" symbol (in the example,
-
Click Apply and then Close.
Step 2: Upload a certificate
Now that you added the user, upload the relevant certificate. To do that:
-
Go to the Certificates tab and click Upload.
-
In the upload dialog box:
- Select the certificate group, in this example
cert_group1. - Enter the certificate password.
- Drag and drop a certificate in PFX or P12 format. In this example,
my-certificate. - Click Upload.
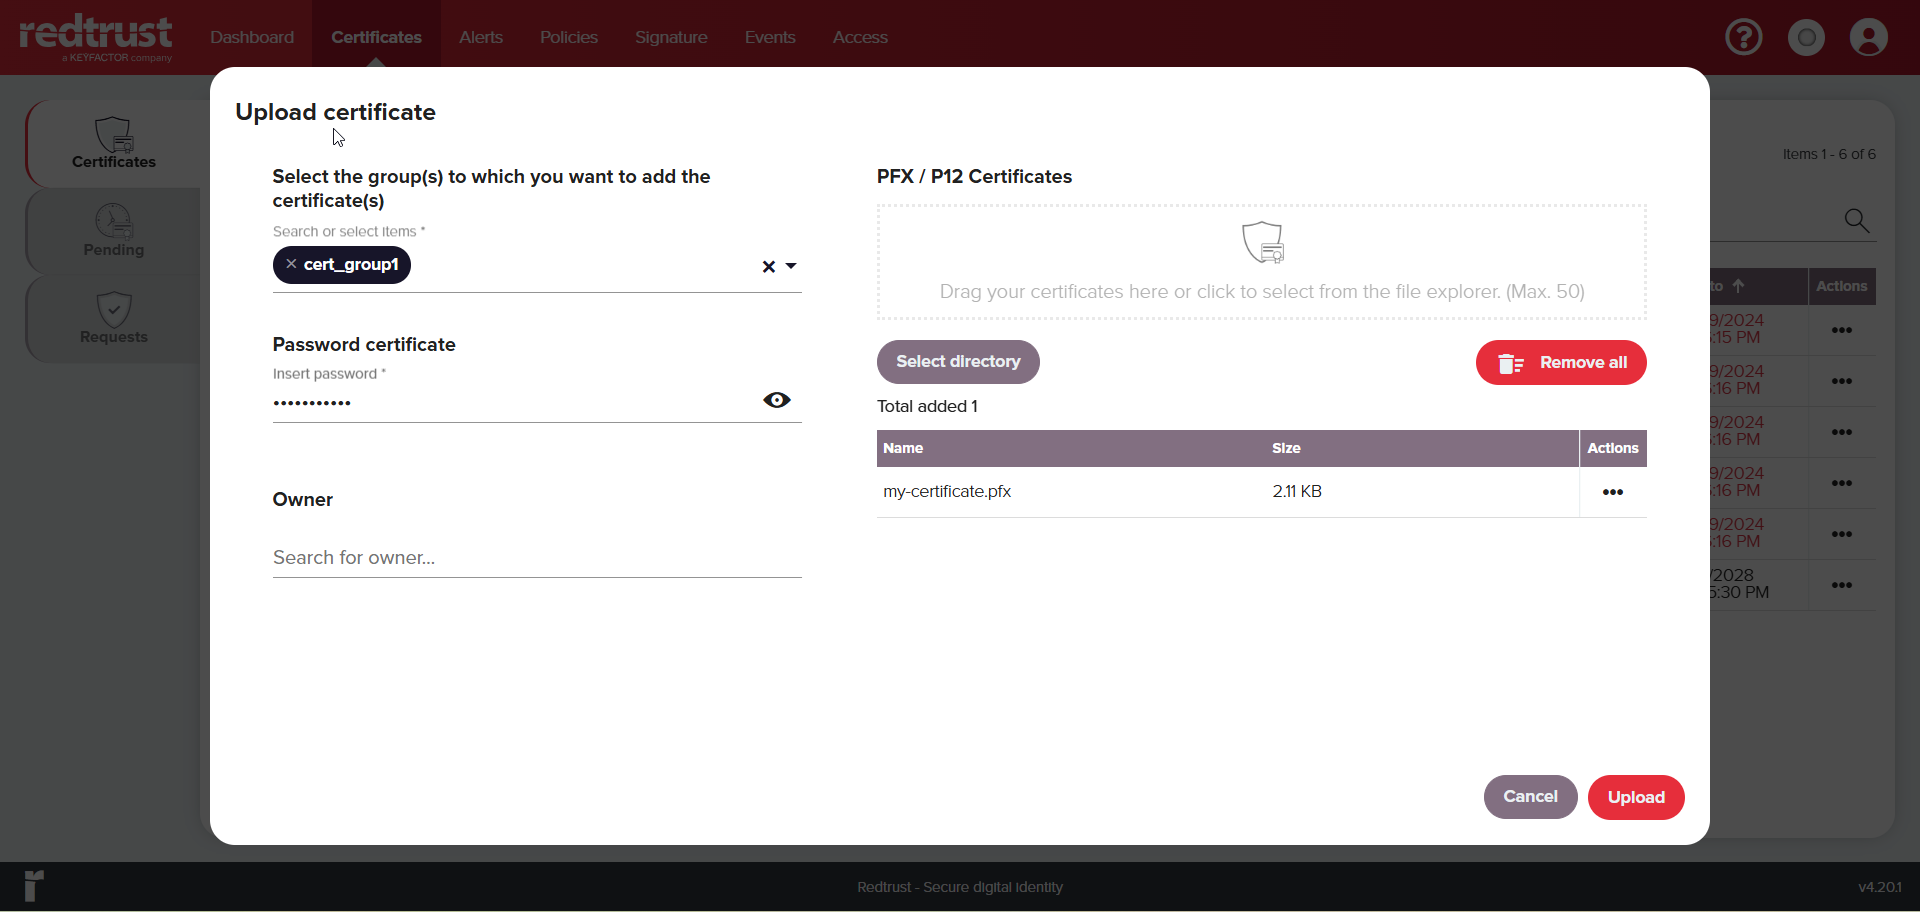
- Select the certificate group, in this example
-
Once uploaded, click Close in the success notification.
From the Certificates section of the navigation menu, you can further configure the certificate by clicking on the certificate row. You can read more about the configuration options in the Certificates documentation.
Step 3: Create application and site groups
Before creating a policy you need to define where the users have access to, that is, a site group and an application group.
-
Go to Policies > Applications and click Add application group.
-
In the window, fill in the following fields:
- Application group name:
all apps. - Process name:
.*. - Click Add and Apply.
- Application group name:
-
Go to Sites in the side menu and click Add Site Group.
-
In the window and fill in the following fields:
- Name:
all sites. - Process name:
.*. - Click Add and Apply.
- Name:
Step 4: Create a policy
Creating a policy is essential to understand and use Redtrust effectively. In this step, you build on the previous two, combining the added user and certificate into a policy that allows access to the certificate to all sites and applications.
-
Go to Policies > Policies.
-
Click New to access the policy creation wizard
-
In the Name field, enter
total accessand click Next.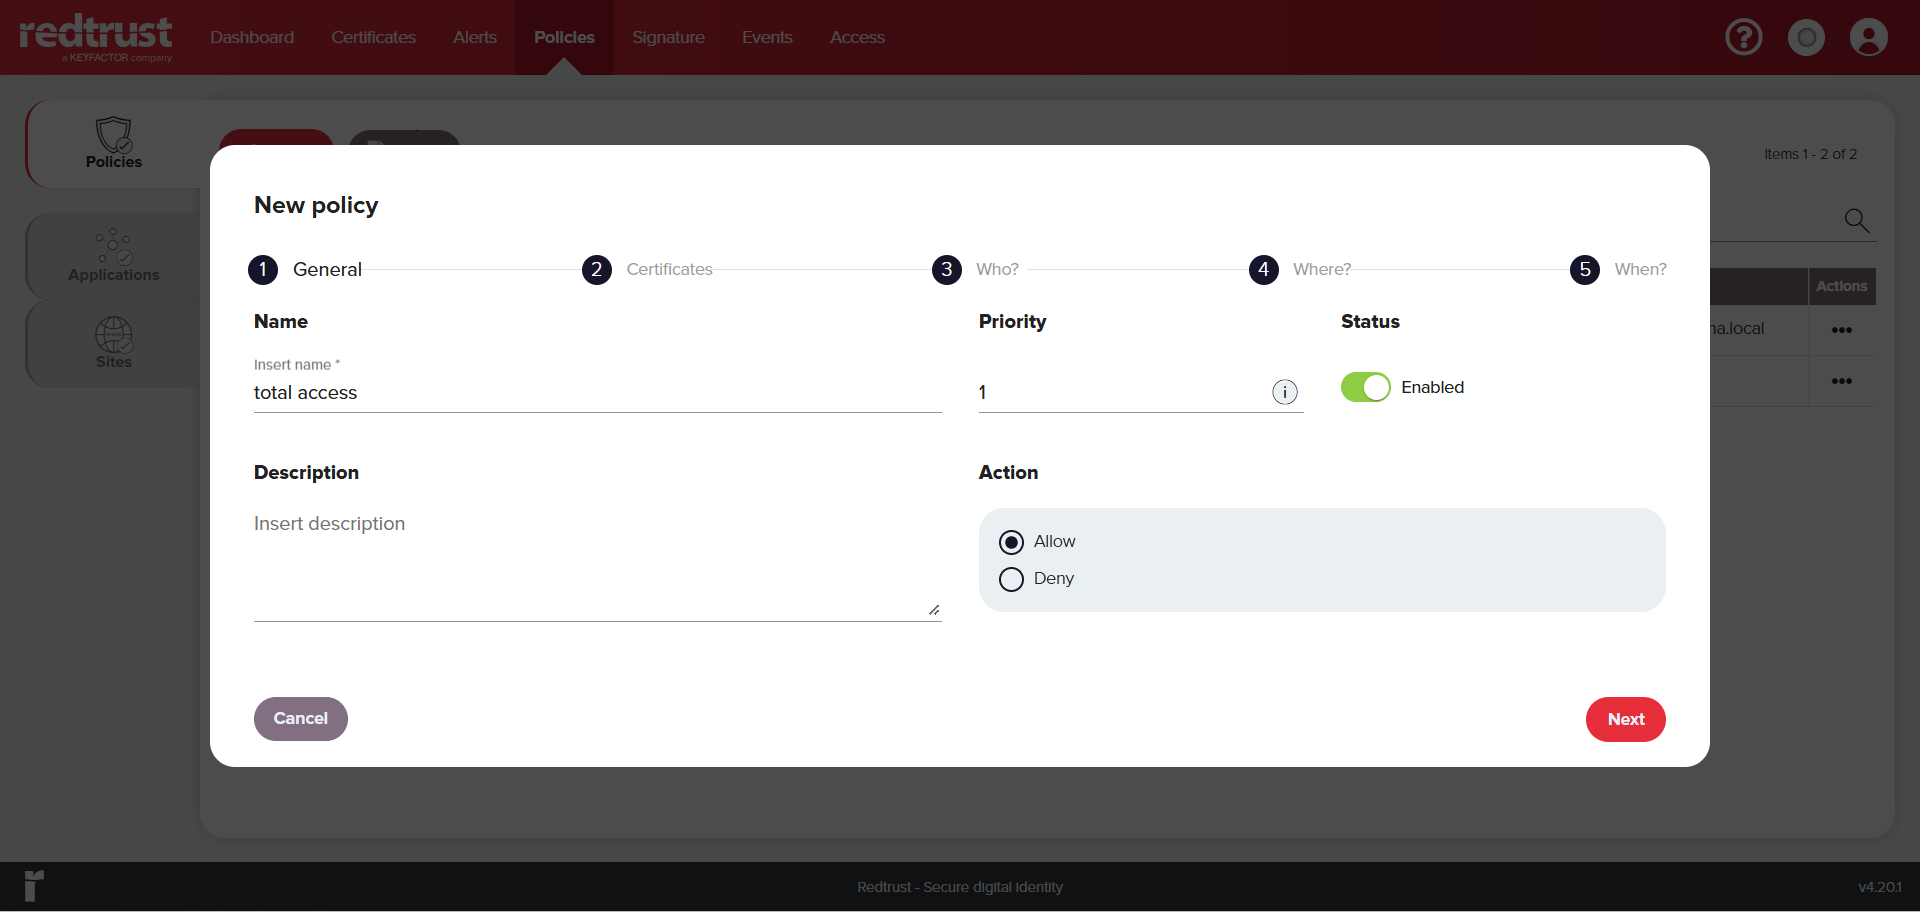
-
In the Select certificate box, select the certificate you uploaded in Step 2 (in this example
my-certificate) and click Next.
-
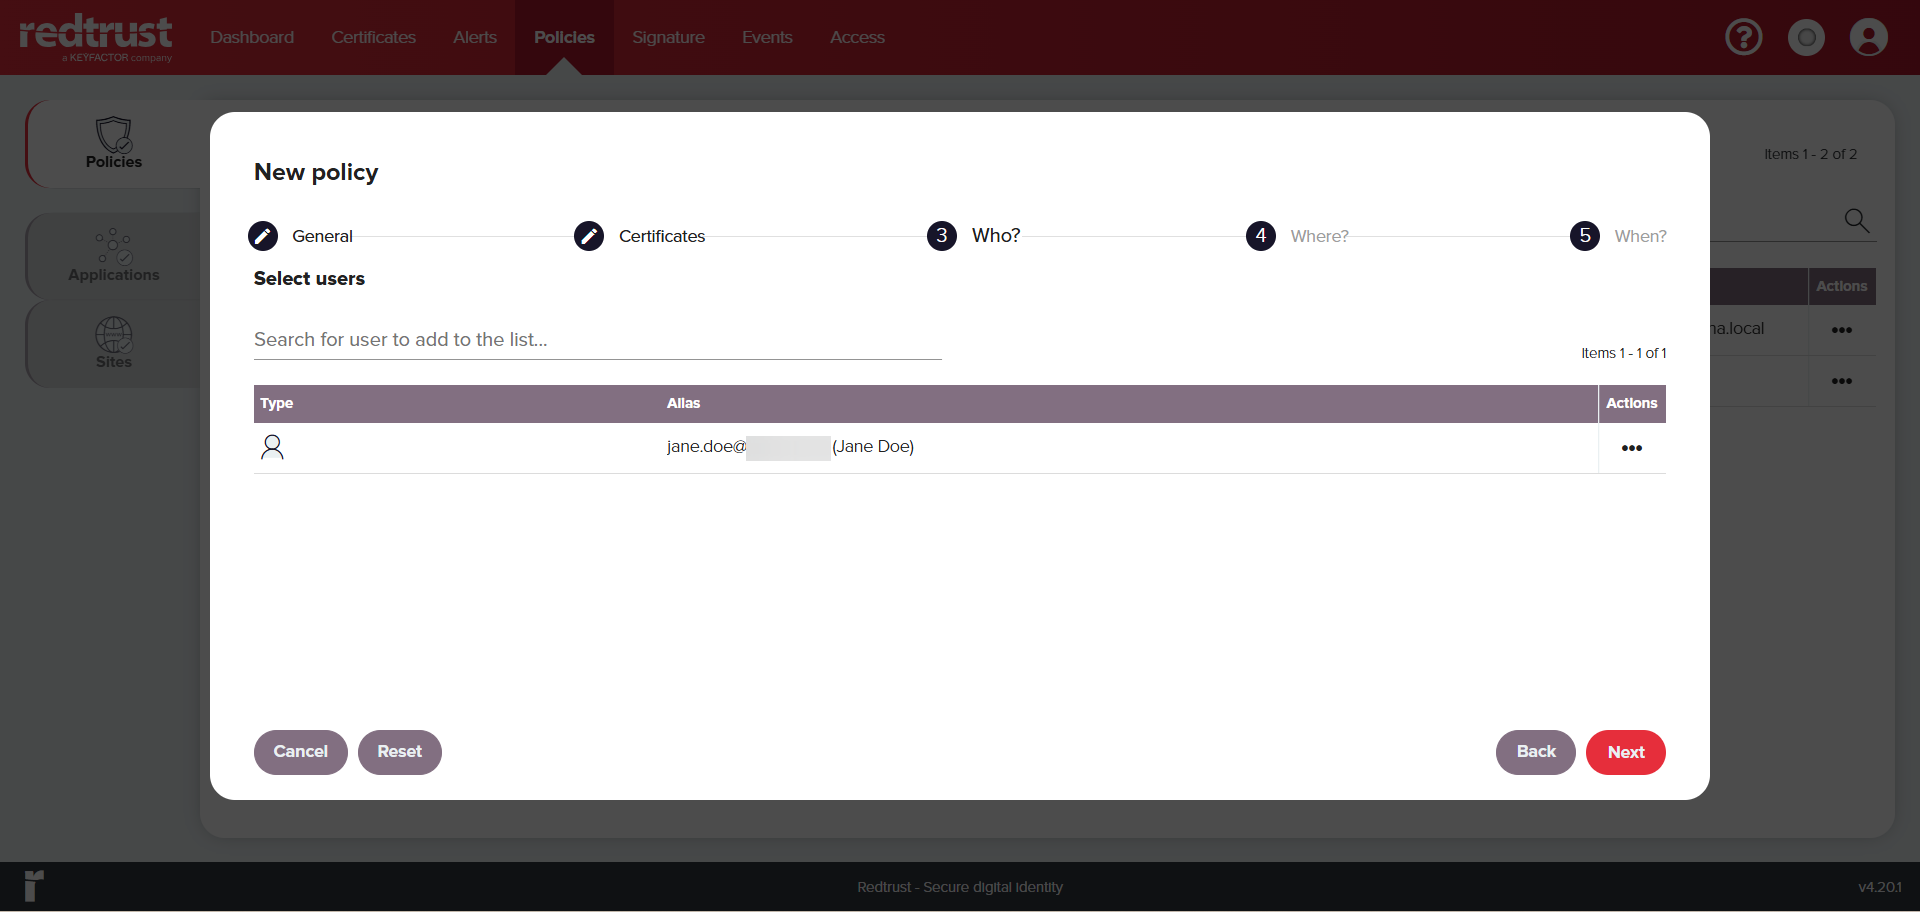
Select the local user added in Step 1 and click Next.
-
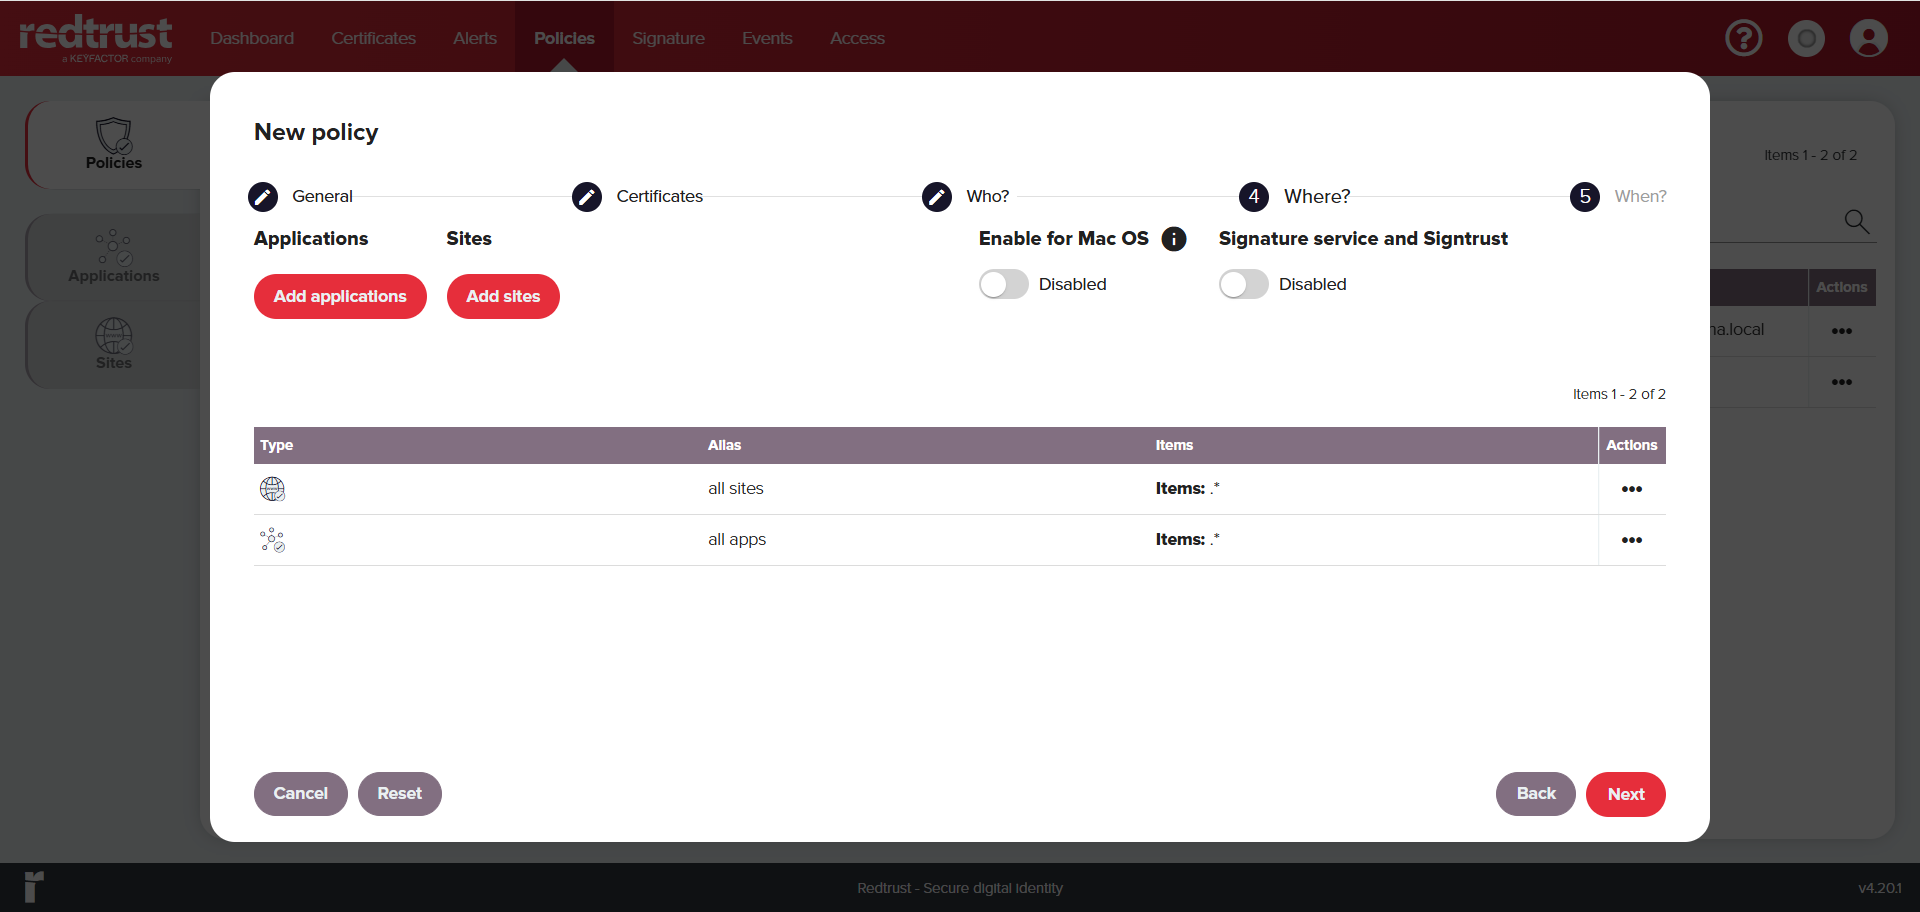
Click Add sites. Add the sites the user can access with the certificate, in this example
all sites. -
Click Add applications. Add the application where the user can make use of the certificate, in this example
all apps. Click Next.importantIf you are creating a local user for macOS, select Enable for Mac OS.
-
In the final step, ensure the Anytime is selected. Click Apply, then Accept.
infoFor more details on the policy configuration options, see the Policies topic documentation.
Step 5: Use the certificate
Follow the steps in How to use a certificate to verify that it's working correctly.
Summary
In this tutorial you created your first policy, a crucial step in understanding Redtrust's certificate management. Throughout this process, you also learned about the admin console, certificates, and user access.
Next steps
Now that you've verified the installation and configuration, you can:
- Integrate Redtrust with an Identity Provider.
- Refine certificate usage rules by creating new policies.
- Learn more about relevant certificates for your use case.
Was this page helpful?