Certificates
Overview
Digital certificates are electronic documents that verify the identity of a person, device, or organization online, ensuring secure communication. They contain a public key used for encryption and identification purposes, along with the owner's information, and they're issued by trusted entities known as a Certificate Authorities (CAs).
In the context of Redtrust, there are different types of certificates, divided into two large groups:
User certificates
The Certificates tab of the admin console lets you manage all types of user certificates.
- Corporate certificates: Digital certificates issued for an organization. Administrators upload these certificates, making them available to both the administrators and the assigned owner. To use a certificate, it must be linked to a policy—unless it has an owner, who then has unlimited access.
- Personal certificates: Digital certificates issued to an individual. Only the owner can upload and use these certificates. Policies can't be used to grant access to these certificates or delegate their use to others.
Distribution certificates
This documentation will help you understand certificates and the way to manage them using Redtrust.
Understanding the certificates view
In Redtrust, you can manage certificates using the Certificates section of the admin console. When accessing this section, users with permissions can view the overall status of the certificate as described in the table below.
| Name | Status | Total uses | Last Use | Groups | Policies | Valid from / to |
|---|---|---|---|---|---|---|
| The alias of the certificate | Quick status of the certificate including:
| The number of times the certificate has been used for signing. | The last time and date of use. | The certificate groups this certificate is associated with. | The policies this certificate has been assigned to. | Certificate's issue and expiration date. |
The following section outlines the actions you can perform from the Certificates tab of the admin console including adding, editing, deleting and enabling certificates.
User certificate operations
Click here to see the list of upload settings.
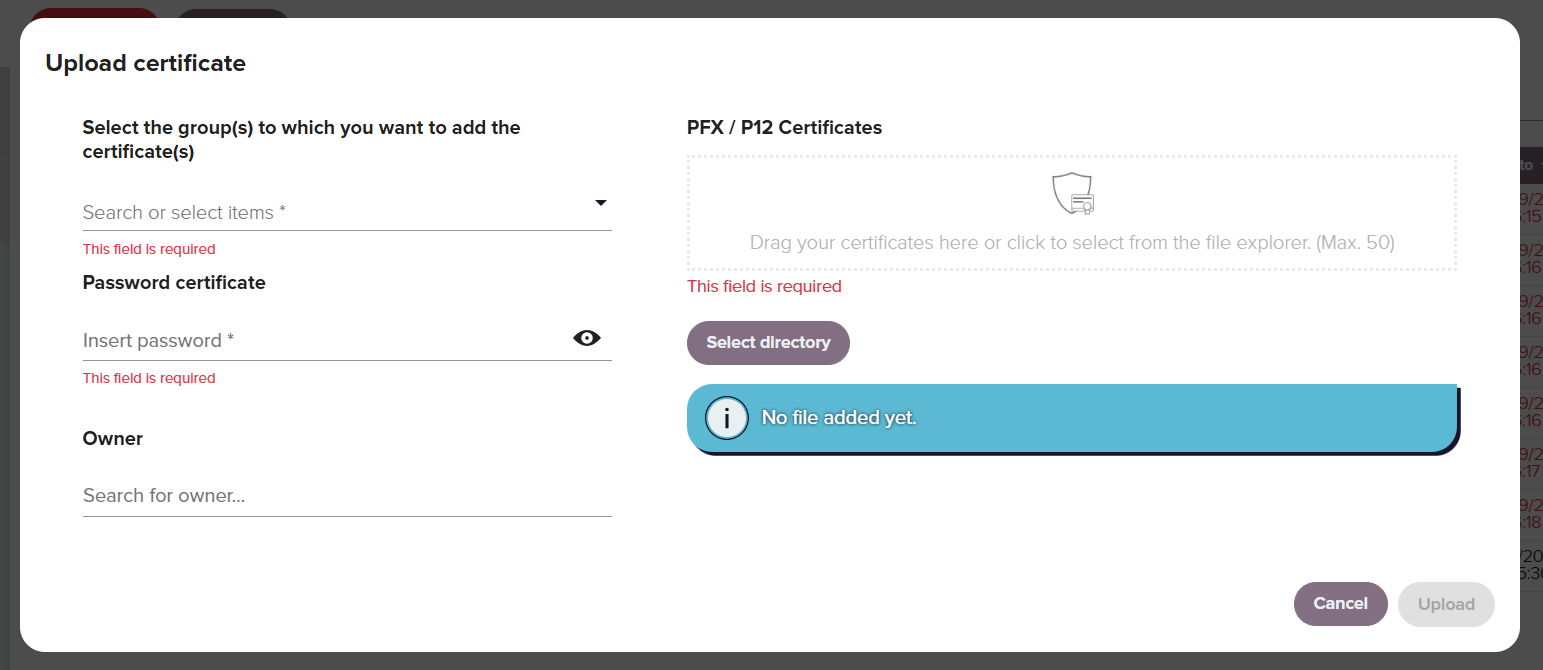
Upload
You can find the upload options under Certificates > Upload.
| Field | Description |
|---|---|
| PFX / P12 Certificates | Select or drag and drop the certificate you want to add in PFX or P12 format. |
| Select the group(s) to add to the certificate(s) | Define the group the certificate will belong to. |
| Certificate password | Requires the password associated with the certificate. |
| Owner (optional) | Defines the corporate user who owns the certificate. This owner has unlimited access to the certificate, regardless of associated policies. Unlike a personal owner, a corporate owner can transfer the certificate to other users and delete it if necessary. |
Only administrators or users with the relevant permissions are able to add the owner.
Click here to see the list of the certificate's settings.
Edit and view
To view and edit a certificate double-click the certificate's row. From the view dialog box you can modify the following characteristics:
| General | Description |
|---|---|
| Certificate Alias | Name of the certificate in Redtrust. It can be different from the certificate's CN value. |
| Owner | Shows the owner of a certificate. The owner can access the certificate superseding any configured policies. The corporate owner is editable. |
| Status | Current status of the certificate (enabled vs disabled). |
| Ask for a reason when used | This option prompt users to add the reason when using a certificate. |
| User PIN policy | No user PIN: This option does not require the user PIN to use the certificate. Ask for user PIN: This option requires the PIN if no policies dictates the opposite. Force asking for user PIN: This option requires the PIN when using the certificate. Option not available for personal certificates. |
| Description | Optional field to enter additional metadata information about the certificate. |
| Other settings | Always ask for PIN: This option prompts users to enter a PIN every time they use the certificate. This code is requested each time the certificate is used, and it is masked (it can't be seen once entered). If the user forgets the PIN code, they have to contact the administrator. |
The rest of the tabs of the dialog box show detailed information on the certificate but their fields can't be edited.
| Associates | Description |
|---|---|
| Associated Groups | Groups that include the selected certificate. |
| Associated Policies | Policies that apply to this certificate. |
| Users involved | Users linked to this certificate because they belong to a policy that includes it. |
| User Groups involved | User groups linked to this certificate because they belong to a policy that includes it. |
The Details and Xt 509 Attributes sections include additional information on the certificate properties including serial number, thumbprint, issuer, extended key usage, etc.
Click here to see the quick actions.
Quick action buttons
A user with the correct permissions can perform the following actions by clicking ⋯ in the policy's row. Using the menu, you can replace, disable, download, delete any certificate.
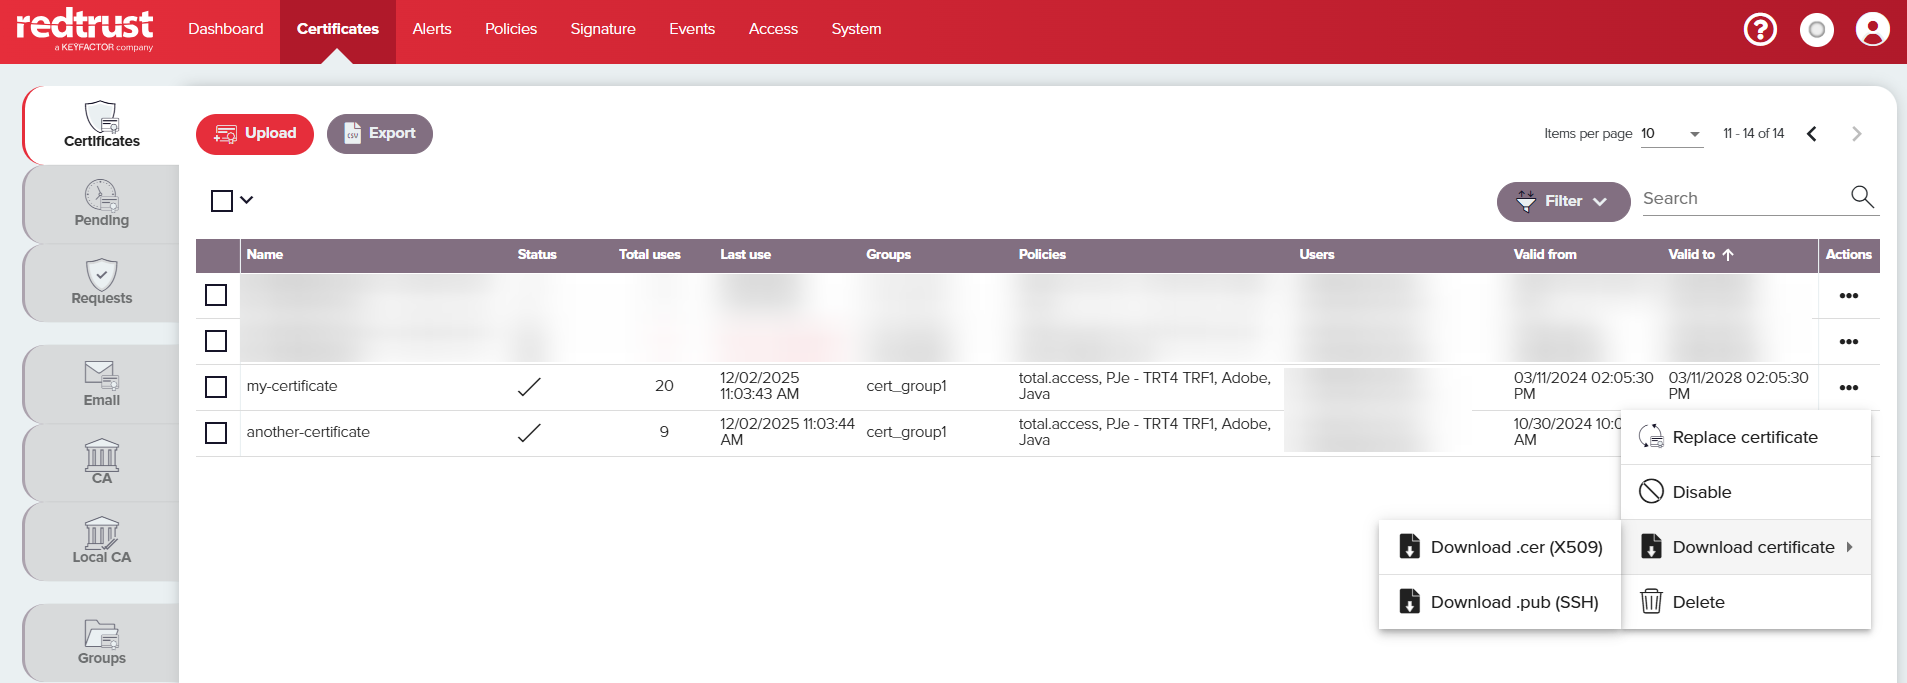
| Quick Action | Description |
|---|---|
| Replace Certificate | Uploads a new certificate to Redtrust, replacing the existing one. The new certificate retains the same name and preserves all associations with certificate groups, policies, and other relationships previously linked to the replaced certificate. |
| Enable / Disable | An enabled certificate can be used by owners or based on assigned policies. A disabled certificate can't be used regardless of any policies or ownership. |
| Download | Download the public key of the certificate as a cer or pub (SSH) file. |
| Delete | Permanently deletes the certificate and associated private key. |
You can also perform actions on individual or multiple certificates by selecting the checkbox next to the certificate or on the table header.

| Quick Action | Description |
|---|---|
| Add groups | Adds a certificate to the selected certificate groups. To add the certificate to a certificate group, the user must have the necessary role permissions. See Creating a role for more information. |
| Remove groups | Removes a certificate from the selected certificate groups. To perform this function, the user needs to have the role permission assigned to remove certificates from groups see Creating a role for more information. Only the Redtrust administrator can remove all group assignments from a certificate. |
| Enable certificates | An enabled certificate is available to be used by owners or based on assigned policies. |
| Disable certificates | A disabled certificate can't be used regardless of any policies or ownership. |
| Delete certificates | Permanently deletes the certificate and associated private keys. |
Pending
The section Pending includes a list of personal certificates that are in a preload state within the system, that is, certificates that must be activated to be used by their owners.
The administrator is in charge of uploading these certificates through the administration console. These certificates must always have an assigned owner. Once uploaded to the system, they appear in the list of certificates pending activation and can be activated by their respective owners from their personal area.
Certificate groups
To be able to effectively use certificates and create policies around them, you need to create certificate groups. These groups help categorize and manage certificates by grouping them based on common characteristics or usage requirements. Furthermore, they and are essential to assign certificates to roles, and assign them policies. These certificate groups are created by Redtrust administrators either during the role creation process (see more information on Roles) or from the Certificate section of the admin console.
The super administrator is the only user that can create certificate groups and that can temporarily remove all group assignments from a certificate.
To create a certificate group:
- Go to Certificates > Groups tab to see an overview of any certificate groups.
- Click Add certificate group.
- In the dialog box, add the Certificate group name and select Unlimited if you want to allow an unlimited the number of certificates for the group.
- Select Apply.
Once the group has been created, you can assign certificates to the group during the requests process.