How to define domain access using application-based authentication
Overview
This guide explains how to define the domains a user can access when authenticating via application.
In Trasport Layer Security (TLS) client authentication, a website requires users to present a valid certificate as proof of identity to ensure secure communication. However, some sites use a third-party application and some local protocol instead, making it difficult to control and track certificate use. For these use-cases Redtrust provides an advanced configuration to limit the certificate use in these domains. This is relevant for Brazilian government websites such as Processo Judicial Eletrônico of the Tribunal de Justiça.
This how-to is useful to users who need to control the certificate use in websites that rely on an application to handle authentication.
For a conceptual overview of how mapped sites work, see Mapped sites.
For use cases where a website manages certificate authentication through an OAuth 2.0 gateway, see How to define domain access for sites using a centralized OAuth gateway.
On macOS and iOS you can't restrict certificate use by application or by site, so this configuration has no effect on those platforms. See Redtrust on Mac, iPhone, and iPad.
Before you start
Some websites use applications to authenticate certificates and communicate to the browser. As a Redtrust administrator, you can define a relationship between the application and the sites it gives access to. Before proceeding with this guide, you must have a Redtrust agent already installed and have basic configuration set up. For the specific use-case described in this guide, you also need to have the PJe Office application installed on your computer.
Step 1: Configure the application group
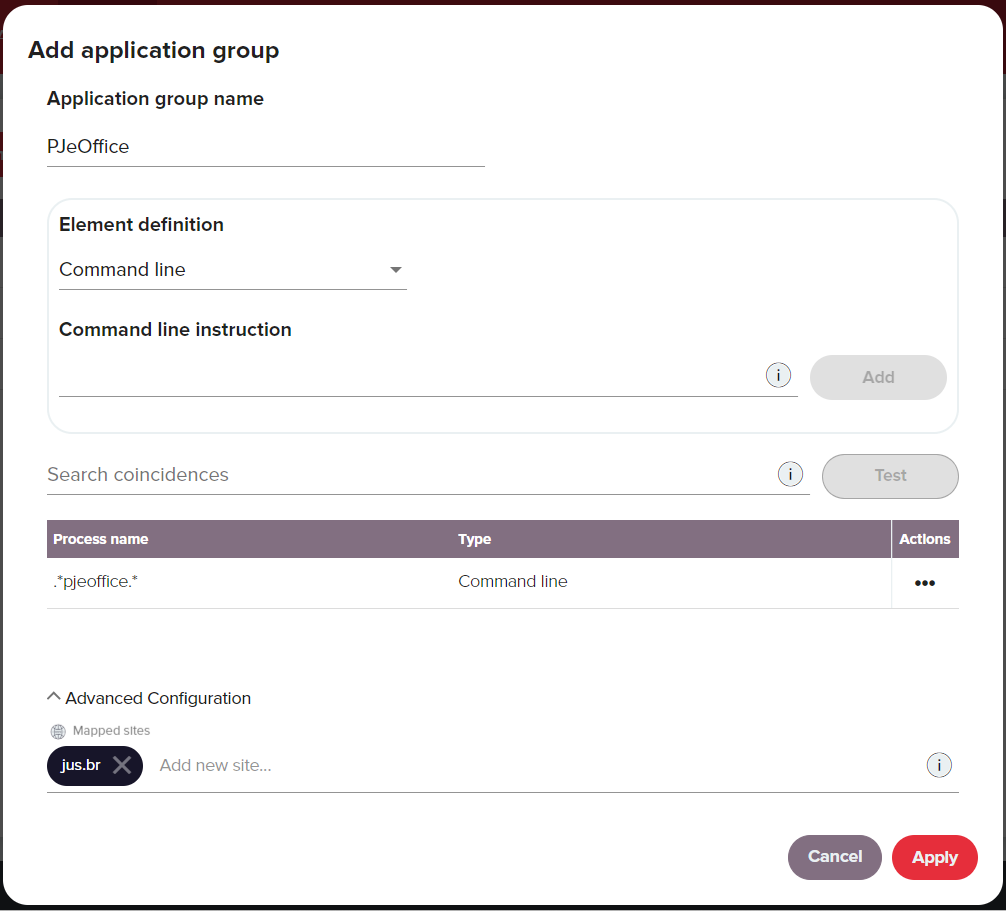
To be able to authenticate a user in a website that uses a Java application such as PJeOffice you have to configure an application group. To do that, go to the admin console and follow these steps.
-
Go to Policies > Applications and click Add application group
-
In the dialog box fill the following fields:
- In the Application group name enter PJeOffice.
- In the Element definition section select Command line.
- In the Command line instruction field add
.*pjeoffice.*. - In the Advanced configuration section, add the domain you need to give access to, in this case jus.br for the Tribunal de Justiça in Brazil.
-
Click Apply to save the changes.
Step 2: Add the site
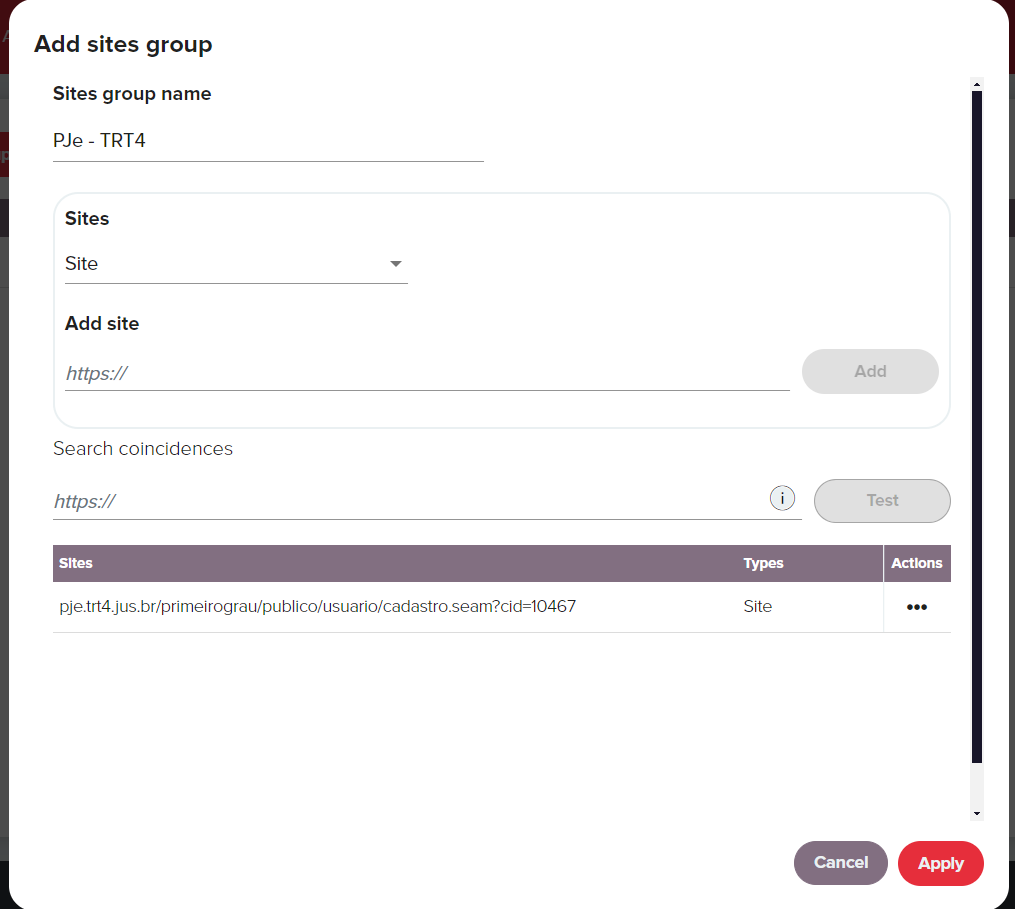
Now, you must define the sites you want the user to have access to. In this example, the admin wants users to have access only to this URL https://pje.trt4.jus.br/primeirograu/publico/usuario/cadastro.seam?cid=10467, which refers to the land registry of the forth region (TRT-4). To define this follow these steps:
-
Go to Policies > Sites and click Add sites group.
-
Add the Sites group name, in this example PJe - TRT4.
-
Add the URL of the site you want to grant access to, in this example https://pje.trt4.jus.br/primeirograu/publico/usuario/cadastro.seam?cid=10467 and click Add.
-
Click Apply.
Step 3: Create a policy
Once you have created this application group, you have to add it to a policy. To do that:
-
Go to Policies and click New.
-
Create a policy in the dialog box as shown in the screenshot below. In this example it's called
PJe - TRT4 TRF1with priority 1.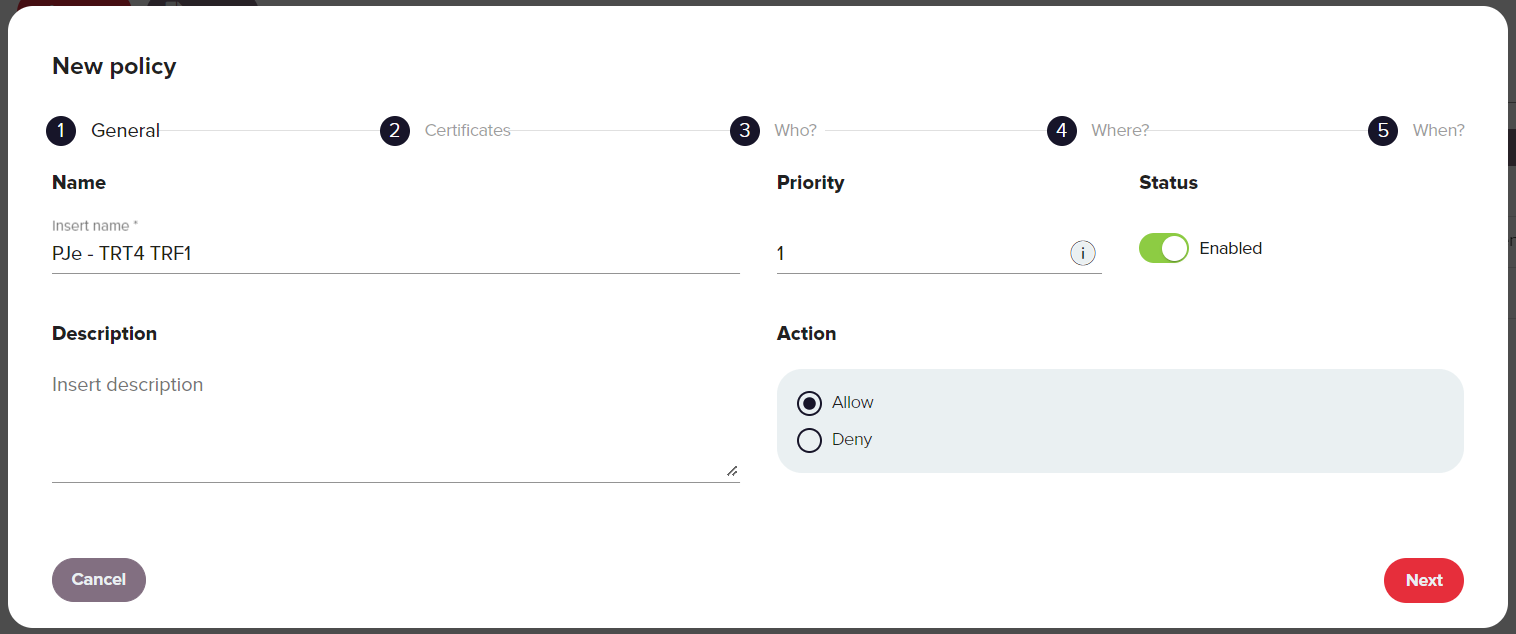
-
Add the certificate and users in the Certificates and Who? steps.
-
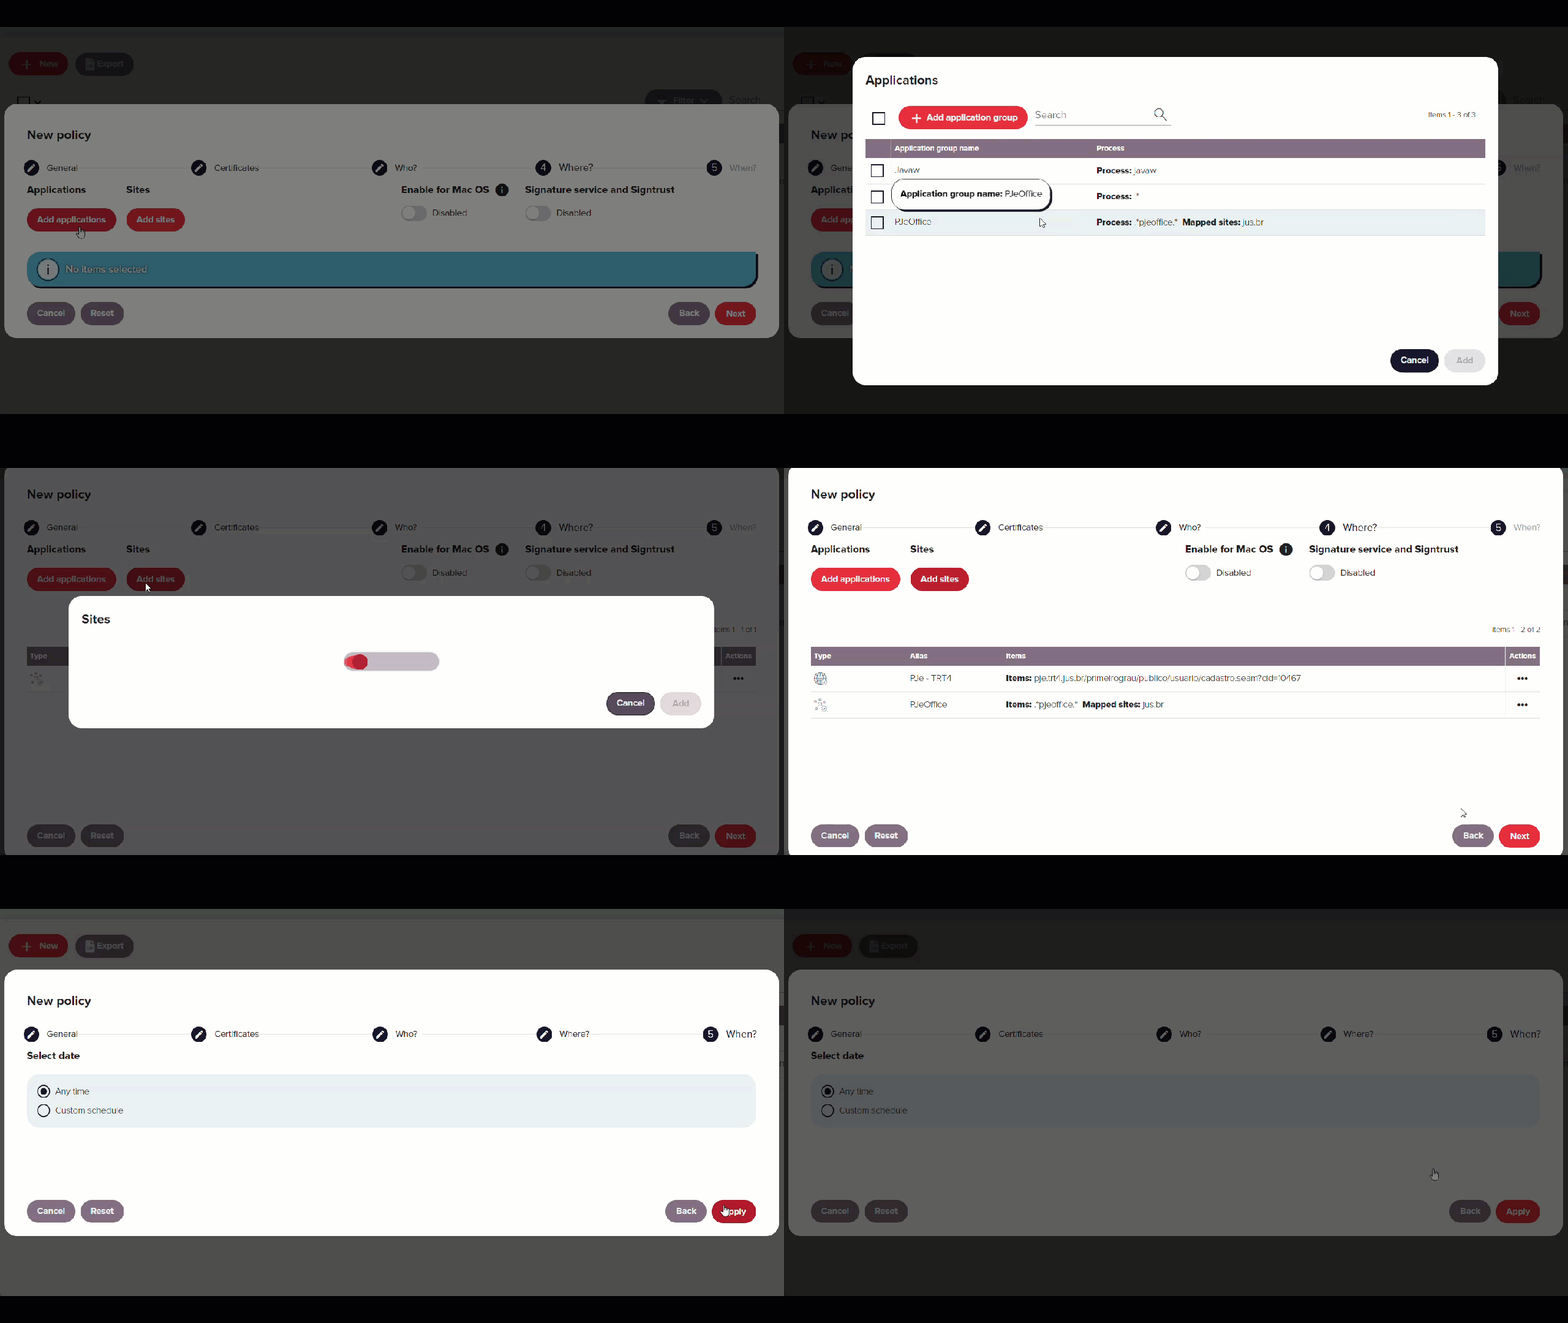
In the Where section:
- Click Add application, select PJeOffice and click Add.
- Click Add sites, select PJe - TRT4 and click Next.
-
In the When step, select Anytime sand click Apply.
-
In the policy overview, click Accept and Close.
For more information on the policies, applications, and sites see the Policy section.
Step 4: Verification
Now you have created a policy with the application group and site. To check that the policy is applied correctly follow these steps:
-
With the Redtrust agent enabled, access https://www.pje.jus.br/navegador/.
-
Select the Rio Grande do Sul and TRT 4 - 1º GRAU.
-
Click Certificado digital making sure the Modo de assinatura is PJeOffice.

If you can access the domain defined in Step 2 but not any other domain within the website, the configuration is complete, and the application now enforces domain-specific access as expected.
Was this page helpful?