How to set up SharePoint integration
Overview
This guide explains how to integrate Redtrust with your SharePoint environment so users can sign documents directly from their libraries—without downloading them. The integration relies on Azure as the identity provider and requires configuration in both Azure and Redtrust. While this guide covers the setup needed to enable the signing capability, you’ll need a workflow to manage how documents are sent for signing and returned (for example, the steps users follow to trigger a signature). This workflow's documentation—typically built with tools like Power Automate—is outside the scope of this guide.
Before you start
Check whether your license includes the SharePoint integration module. To do this:
- Go to the admin console.
- Navigate to System > Unit > License.
- In Unit settings and status > Available modules, verify that SharePoint integration is listed.
Set up Azure
Step 1: Register Redtrust
To set up Azure for SharePoint integration, register a new application:
- Go to Home > App registrations and click on + New registration.
- Fill out the form as follows:
- In Name, enter the name you prefer. In this example,
redtrust-app. - Select Accounts in this organizational directory only.
- Select Single-page application (SPA) and add
https://YOUR_REDTRUST_IP/personal/signtrust. - Click Register.
- In Name, enter the name you prefer. In this example,
- In the overview section, copy the Application (client) ID and Directory (tenant) ID.
Step 2: Define access and ID tokens
- In the sidebar, go to Manage > Authentication and check the redirection URI.
- In the Implicit grant and hybrid flows section, select:
- Access tokens (used for implicit flows)
- ID tokens (used for implicit and hybrid flows).
- Click Save.
Step 3: Add permissions
- Go to Manage > API permissions and click Add a permission.
- Click Microsoft graph and Delegated permissions.
- In the OpenId section, select all four options:
- offline_access
- openid
- profile
- In the Files section, select:
- Files.Read
- Files.Read.All
- Files.ReadWrite
- Files.ReadWrite.All
- In the Sites section, select:
- Sites.Read.All
- Sites.ReadWrite.All
Set up Redtrust
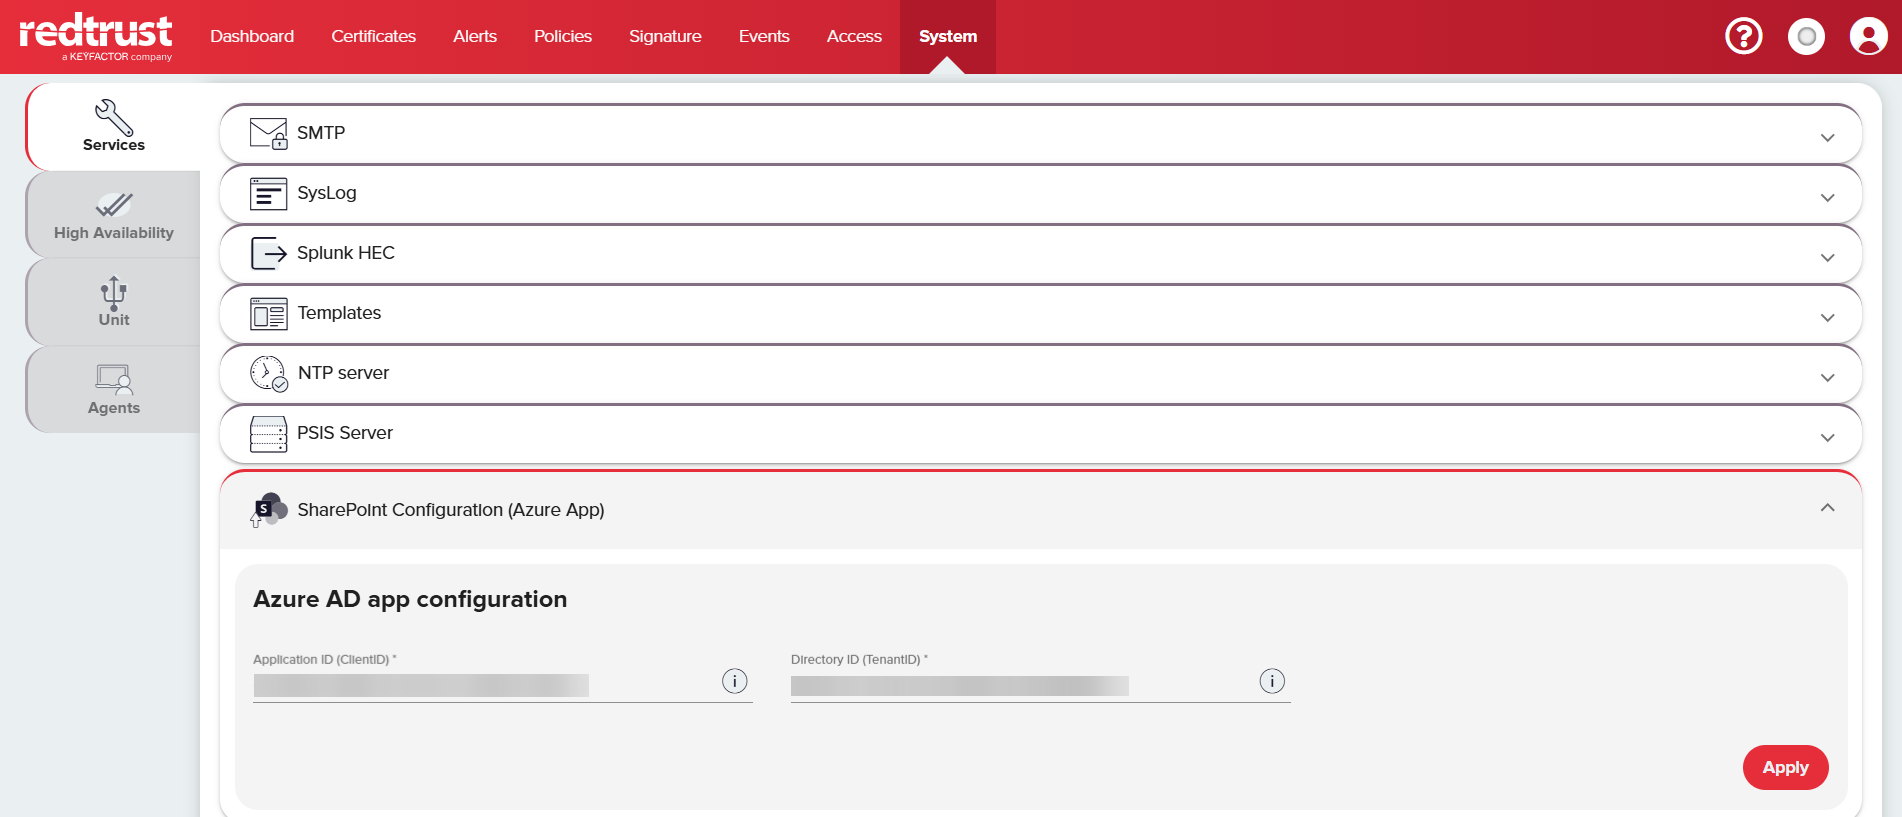
Step 1: Add app registration details
To configure Redtrust, use application ID and directory ID you copied in Step 1.
-
Go to System > Services > SharePoint configuration (Azure App).
-
Enter the values for, Application ID (ClientID) and Directory ID (TenantID).
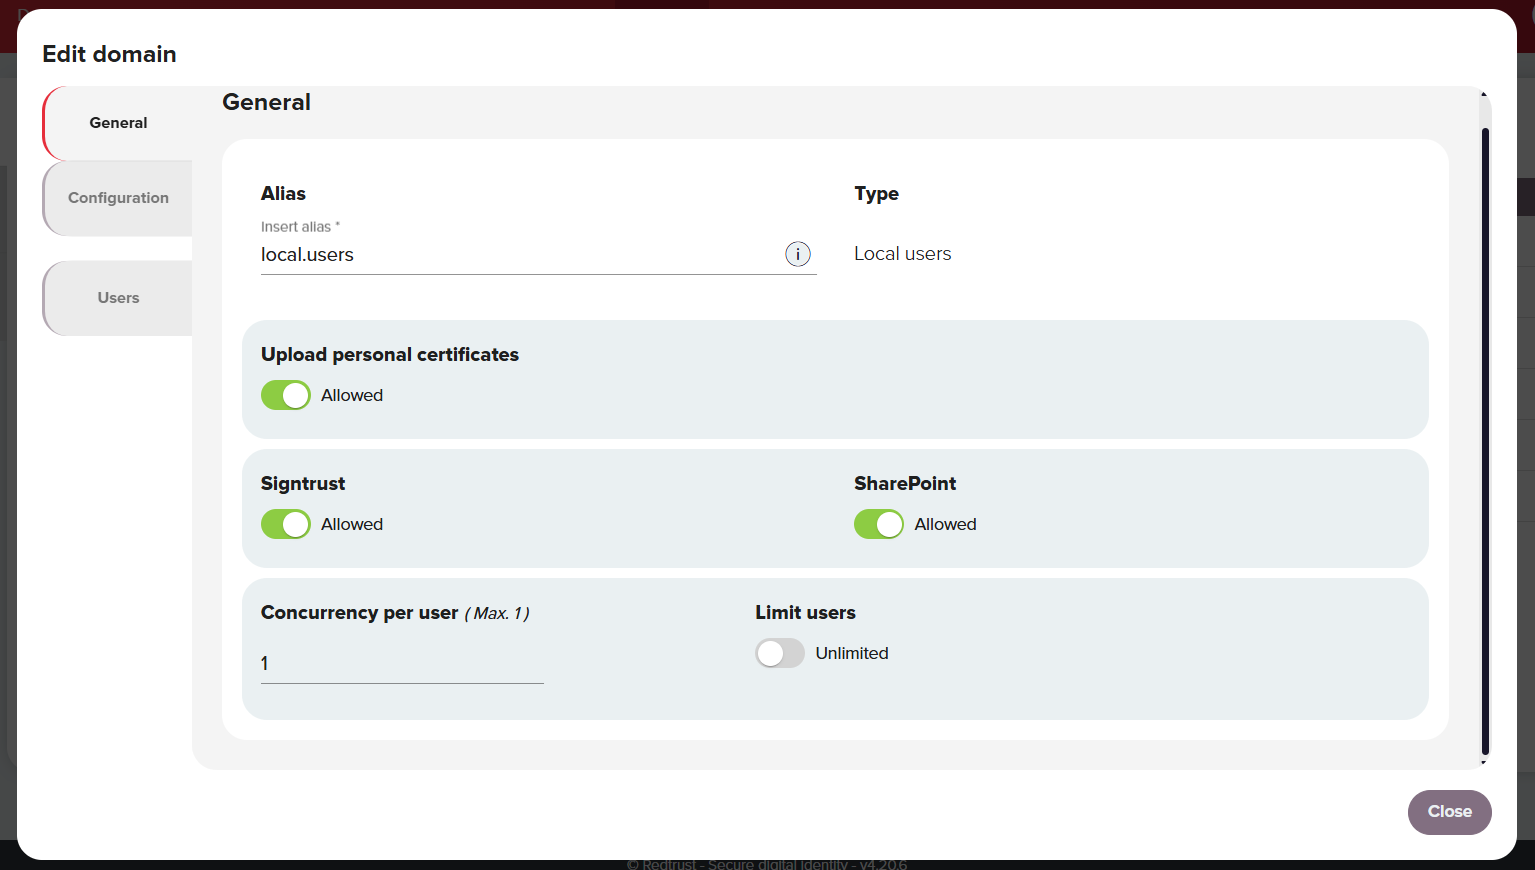
Step 2: Optional configuration
You can optionally define SharePoint access for users within a specific domain. To do this:
-
Go to Access > Domains and select a domain.
-
In the General section, select the SharePoint option.
Signtrust endpoint for workflow integration
When configuring your signing workflow in Power Automate, you’ll need to send documents to the Signtrust signing endpoint.
Use the following URL:
https://YOUR_REDTRUST_IP/personal/signremote/signremotedocument?jsonBase64=BASE64_PARAMETERS
Replace YOUR_REDTRUST_IP with the IP address or domain of your Redtrust instance, and BASE64_PARAMETERS with a base64-encoded string. This string has to be a JSON object with the following parameters:
    {
    "driveId": "b!q2wJu5WgZEiqahqoPmJcnEKRV9k2K75IrlGpprAS4_aTDIcxwASjTIIfH1T04_-K",
    "driveItemId": "014YINEYBE5XXQHMP3NRELYONHGZJJ4EFM",
    "mode": "new",
    "suffix": "_signed",
    "domain": ""
    }
The resulting string from encoding this JSON in base64 has to be appended to the endpoint URL path, as in this example:
https://YOUR_REDTRUST_IP/personal/signremote/signremotedocument?jsonBase64=e
woiZHJpdmVJZCI6ICJiIXEyd0p1NVdnWkVpcWFocW9QbUpjbkVLUlY5azJLNzVJcmxHcHByQVM0X2FUREljeHdBU2pUSUlmSDFUMDRfLUsiLAoiZHJpdmVJdGVtSWQiOiAiMDE0WUlORVlCRTVYWFFITVAzTlJFTFlPTkhHWkpKNEVGTSIsCiJtb2RlIjogIm5ldyIsCiJzdWZmaXgiOiAiIgp9
To understand the JSON parameters better, see Signing endpoint parameters table.
Summary
This setup establishes the connection between SharePoint, Azure, and Redtrust, laying the groundwork for document signing directly from SharePoint libraries. To complete the integration, you now need to implement a workflow—using tools like Power Automate—that defines how documents are sent for signing and returned.
Was this page helpful?